
Whether you're an architect, a contractor, or a building owner, knowing how to operate the Lunos HRV system will help your building and its occupants get the most out of balanced, decentralized heat recovery ventilation. This guide will ensure that you're set up for success.
How It Works: The System As A Whole
The basic Lunos unit is a through wall fan, with a ceramic regenerative heat exchanger behind it. But the fan doesn't become a heat recovery ventilation system until two fan units are combined in pairs. (With the Lunos e², the fans will be inside two different tubes that are on opposite ends of your space. For the Lunos eGO, both fans are in the same tube.)
Each Lunos system provides heat recovery ventilation by synchronizing the direction and speed of air flow through the ceramic cores. By reversing the air flow on regular intervals, the ceramic cores capture and release heat to condition the interior space at optimal efficiency - while maintaining balanced ventilation.
The reversal intervals of the fans are as follows:
- e² USA (standard): 70 seconds (full cycle 2:20)
- e² USA short: 55 seconds (full cycle 1:50)
- eGO: 50 seconds (full cycle 1:40)
This video illustrates the operation of Lunos HRV systems:
How it's set up: the electrical components of the system

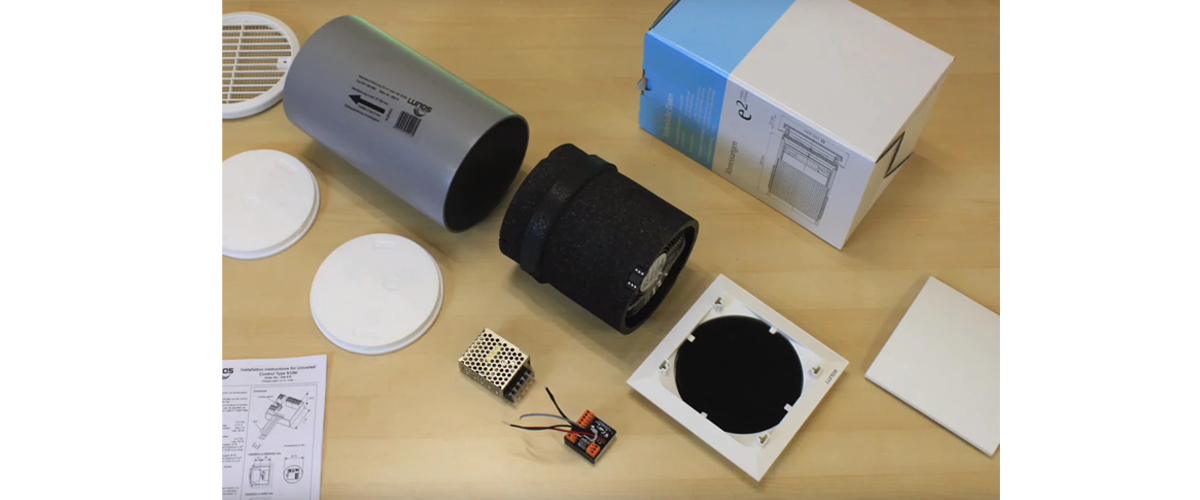
Lunos e² components that come in the box, including transformer and universal controller. You supply the rocker switches, switch plate, electrical box and low voltage wire.
A great way to start is to watch our Lunos e² installation video, which goes through all the electrical components and wiring steps for a typical system. The wiring for the Lunos eGO is similar to that of the e². If you have any questions beyond the video, detailed wiring diagrams can be found on the e² and eGO product pages.
Lunos e² units work in pairs, with a maximum of 4 fans connected to a double rocker switch. Lunos eGO units work as a single self-contained system, with one eGO per switch. In either case, you'll have the following behind your switch plate:
- a transformer which brings the 110V power coming from your breaker down to 12V
- a controller which sets the flow rates that you want your switches to dictate to the connected fans
- An indicator light connected to the controller, for indicating need for filter cleaning/exchange
- an electrical box which houses the transformer and controller
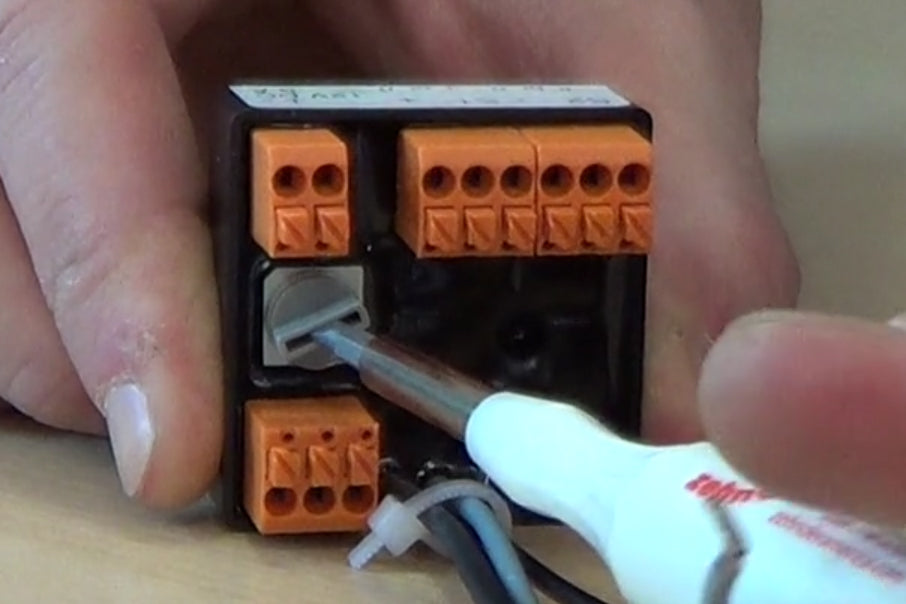
The wires running from the controller to the fans need to be 18 gauge solid (not stranded) thermostat wire.
Note: Take care to properly identify the left and right sides of the rocker switch when wiring to your controller (see at 7:02 on video). Otherwise your switches could operate backwards. Also make sure the LED filter indicator light is positioned to be visible behind the switch plate.
How It's Programmed: The Universal Coding Dial
If you are operating standard (12"-20") e² fans, turn this dial to 6. If your fans are short (7.5"-10.5"), turn dial to 7.
Be sure that you (or your installer) match the small grey coding dial on the controller with the type of system you're installing. This dial setting determines how the flow rate mode for each unit is programmed. Here's a quick reference guide:
- e² USA (standard): Code 3, 4, or 6
- e² USA short: Code 5 or 7
- eGO: Code 9, A, B, or C
The charts below lay out a number of different flow rate modes for different Lunos systems, including the e² and eGO. (Also refer to the e² installation video at the 4:47 mark.) Note that the e² controller has only one recommended mode setting for each fan length, whereas the eGO controller offers four modes that include exhaust-only options.
e² Controller Settings

eGO Controller Settings

Note: setting the coding dial is typically only done once at the beginning of the system setup. However, if your flow rates don't seem right, or you wish to change your eGO mode, it may make sense to go back inside your electrical box to change the dial setting.

Our Lunos rocker switch labels help you get your flow rate right. In this picture, only rocker II is ON. If connected to a Lunos e², it would produce MEDIUM (15 CFM) ventilation.
How It's Operated: The Double Rocker Switch
First, note that the switches don't control each fan separately, but rather the rate of ventilation for the whole system - based on the program that you set with the grey coding dial.
The e² modes each have 3 flow rates and an off setting (see controller settings charts, above). Since 2 rocker switches have 4 combinations, each flow rate is represented by a different rocker switch combination, as follows:
Lunos e² rocker settings:
- Position 1 = Left (W1) OFF*, Right (W2) OFF*: system is OFF
- Position 2 = Left (W1) ON*, Right (W2) OFF*: system is LOW (10 CFM)
- Position 3 = Left (W1) OFF*, Right (W2) ON*: system is MEDIUM (15 CFM)
- Position 4 = Left (W1) ON*, Right (W2) ON*: system is HIGH (20 CFM)
* OFF = switch position down, ON = switch position up
Lunos eGO rocker settings:
The Lunos eGO is a bit more complicated because there are 4 modes (9, A, B and C) instead of one, but the idea is the same. Using the switch positions listed above (ex: Position 2 = Left ON, Right OFF), we list the different possible speed for each of the 4 modes. Note that 3, 6, 9 and 12 CFM are all balanced ventilation settings, whereas 27 CFM is exhaust-only for removing moisture quickly.
- Mode 9: Position 1 = OFF, Position 2 = LOW (3 CFM) , Position 3 = MEDIUM (6 CFM) , Position 4 = HIGH (12 CFM)
- Mode A: Position 1 = LOW (3 CFM), Position 2 = MEDIUM (6 CFM), Position 3 = MED-HIGH (9 CFM), Position 4 = HIGH (12 CFM)
- Mode B: Position 1 = LOW (3 CFM), Position 2 = MEDIUM (6 CFM), Position 3 = HIGH (12 CFM), Position 4 = EXHAUST-ONLY (27 CFM)
- Mode C: Position 1 = OFF, Position 2 = LOW (3 CFM), Position 3 = MEDIUM (6 CFM), Position 4 = EXHAUST-ONLY (27 CFM)
How It's Operated: The 475 Rotary Switch

Named for its designer, the 475 Rotary Switch for Lunos is also known as the Miceli Switch.
This Rotary Switch was designed and developed by 475 High Performance Building Supply to offer straightforward control of the LUNOS e2 or ego. It's a simple and stylish 4-position rotary dial that corresponds to each of the 4 ventilation settings. The faceplate decal illustrates flow rate at each knob position. This can be an aesthetically pleasing replacement for double-rocker switches that is seldom mistaken for a light switch.
Rotary Switch Operation:
- Knob position: 12 o'clock =OFF
- Knob position: 1 o'clock =LOW
- Knob position: 2 o'clock =MEDIUM
- Knob position: 3 o'clock =HIGH
- Summer Mode: Rotating from LOW to MEDIUM and back to LOW again (within 3 seconds) will put the system into summer vent mode (ventilation without heat recovery). Repeat those actions to transition out of summer vent mode, back to heat recovery mode.
Miscellaneous Questions
What is Summer Ventilation mode? (Or why is my heat recovery not working?)
In the hot summer season it may be desirable to use the Lunos fans to help passively cool the building at night. "Summer Ventilation mode" runs each fan in one direction for 60 minutes before reversing. In this mode, heat recovery is suspended and interior spaces are flushed with cool nighttime air. This helps to set a cooler baseline before returning to regular heat recovery mode for the daytime. How is this better than opening a window? With a still night, opening a window won't necessarily provide ventilation, but the Lunos in Summer Ventilation mode will provide a predictable and steady flow of filtered fresh air.
- To turn Summer Ventilation Mode on or off, simply "rocker" the right rocker switch once up and down (or down and up) within 3 seconds. To return to normal heat recovery mode manually, wait 10 seconds and again rocker the right switch.
If you sense that the Lunos heat recovery isn't working, or you're just not sure which mode you're in? Simply listen to one fan for up to 70 seconds - if you don't hear the fan reverse (get up close, it's quiet), then you're in Summer Ventilation mode.
Why is the LED indicator light on? And how do I turn it back off??
Approximately every three months the LED filter indicator will light up - alerting you that it's a good time to clean or replace the filters in your Lunos system. We recommend the following filter maintenance schedule:
- Every 3 months: wash filters in warm water, squeeze dry, replace
- Every 2 years: replace filters
To turn off the LED, simply "rocker" the left rocker switch once up then down (or down then up) within 3 seconds.
If I turn the Lunos system off, don't I now just have an energy leak in my wall?
It's best to leave your HRV system running continuously 24/7. First, running the system continuously will benefit your indoor air quality. Second, the e² is extremely efficient - using only 1.4W at 10 CFM (ie 2.8W per e² pair) - so your Lunos system hardly turns the dial on your electricity meter. Third, a Lunos e² or eGO unit operating in heat recovery mode is an integral part of your home's high performance heating and cooling system.
If you do want to turn your Lunos system off (eg going on vacation), change the cover to its closed position:
- Turn system off
- Remove the interior cover
- Rotate cover 180 degrees
- Replace cover - it will snap all the way shut (as opposed to keeping it's normal half-inch gap)
- Don't forget to set everything back to normal when you return home!
Other Troubleshooting Questions?
Contact the experts at 475, and we'll be happy to assist.
