
Double row of staples every 1/8" before cellulose blow in with webbing
Stapling the membrane in place:
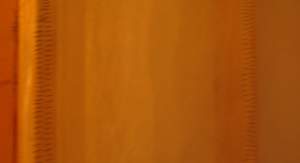
Unlike typical netting/mesh used in most cellulose installations today where staples are installed every 1/16" (see photo), with reinforced INTELLO PLUS we recommend staples every 2" (50mm). * For maximum tear resistance apply the staples parallel to the studs (see photo below). Staples should be at least 3/8"-10mm wide, 5/16 (8mm) legs T50's (heavy duty) - otherwise blow-outs can occur.

A staple 2" or less on center to secure the INTELLO Plus in place for blow-in cellulose /mineral wool / fiberglass insulation. - Following the direction of the stud.
Alternatively, one can use cap nails, every 2.5" o.c.
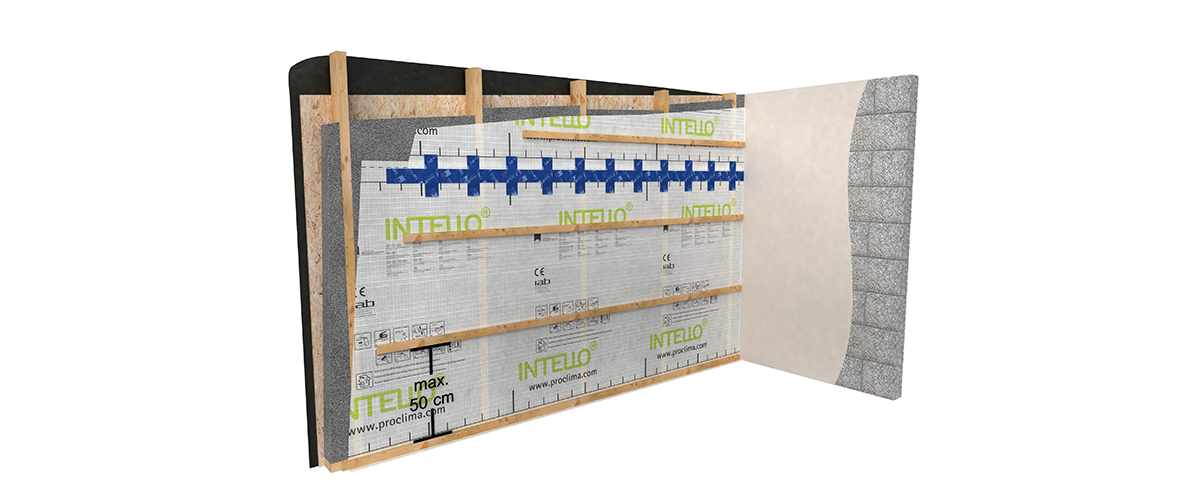
Tape overlaps with TESCON VANA
Pressurize the tape with a PRESSFIX. Next, apply horizontal counter-battens that are spaced maximum 20" o.c. (for sheetrocking ease, 16" o.c. works best) - this helps support the dense-pack, provides a gap for "bulging" and creates the all-important service cavity. If a taped membrane overlap is not supported by a battens, it is required to reinforce the seam with perpendicular strips of TESCON VANA. every 8-12" (see image below). Make sure to use stitch tape at the every stud, as the pressure on the membrane/tape joint will be most stressful there.

Large spacing (24" o.c.) of the counter battening is not recommended. As this does increase the tension on the staple connections and requires the staple spacing to be even closer together and the importance of staples being flush with the studs increases (staples flush with the studs are also airtight, crooked staples are not...). The staples when using 24" o.c. battens have a risk to pop and cause airleaks - the same is true for trying to dens-pack without counter battening. This is possible, but would require many more staples (1" 0.c. parallel with the studs), and you do need to roll the cellulose to enable sheetrock installation (bulges otherwise makes it impossible) - another option would be to use batt insulation in walls were counter battening is not possible.

Cellulose/Wood fiber installation:
Cut a hole in your airtight membrane about 8" (200mm) below the top of the void. This should give you sufficient room to move the tube all the way down in the cavity, but also assure you can dense pack the top to sufficient pressure. (Also cut a hole in the top of the next few bays - these slits will alleviate air pressure build up and assures proper dense packing of the corners)
Feed the hose through that hole to the bottom of the cavity and pull it back 10" (250mm). Start blowing the insulation, to make sure all corners in the bottom are filled, twist the tube 180 degrees (stiff tubes or "needles" are better for this purpose). Then work your way upwards, slowly packing the cavity to density between maximum 4.0 lbs/CF (65kg/m3) and minimum 3.5lbs/CF (56kg/m3).
Sequence of insulation install - demo with fully transparent panel - with INTELLO you will be able to see and feel the density of the cellulose dense packing as well. (Photo:Clioma.ie)
Use a mat/sponge around to pipe to fill the top of the cavity to required pressure (blowing up and into all corners). As Bill Hulstrunk, of National Fiber explained to Martin Holladay on Green Building Advisor:
With experience, the installer can determine the density by the way it feels. Between 3 and 4 pounds per cubic foot, the feel of the installed material goes from soft (at 3 pounds) to actually hard at 4 pounds. At 3½ pounds per cubic foot, it will feel like a firm mattress. It really changes dramatically between 3 and 4 pounds. (56kg/m3 to 65kg/m3)
Because the membrane is flexible and translucent, inspection to ensure a complete fill is facilitated. Once the dust is settled (there won't be much as INTELLO is airtight), make the membrane dust-free and apply 6" patches of TESCON VANA over the blow-in holes to reconstitute your airtight layer.
Patches like these are best done with 6" squares of TESCON VANA 150. Cellulose dense packed in place at 3.5lbs/CF (56kg/m3) staying packed after removing 'netting' (Photo:Clioma.ie)
Due to INTELLO's translucency and INTELLO Plus (DB+)'s reinforcement grid makes it the perfect choice for safe and consistent cellulose installation and quality control of cavity fills and cellulose density. Cellulose or Wood fiber as the insulation material of choice, guarantees a perfectly gap free insulation layer and practically eliminates unwanted air movement behind the airtightness layer/within the insulation layer. If installed at the right density with counter battens, it is even slightly "spring-loaded" (when not rolled) and able to conform to the movement, shrinkage, settling and expansion of a wood-framed structure. The perfect base for the INTELLO to do it´s job!
* Pro Clima prints on INTELLO membranes that staples are needed every 4" (100mm) but we only recommend this spacing when the insulation is already in place (with mineral wool, cellulose, cotton or other fibrous batts).
